


How Do Bi-Fold Shutters Doors Work?
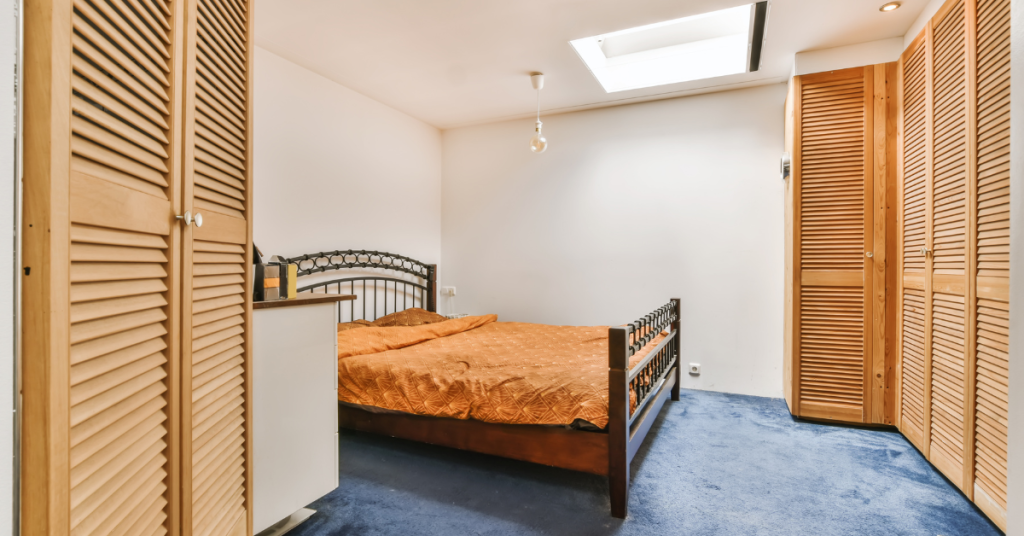
Want to know how those sleek and sophisticated bi-fold shutter doors work? Look no further! In this article, we’ll dive into the inner workings of these innovative doors. You’ll discover the mechanism behind their smooth folding action and explore the components that make it all possible. Get ready to slide and open your way to a deeper understanding of bi-fold shutter doors. Plus, we’ll uncover their various benefits and applications. Let’s get started! Understanding the Mechanism of Bi-Fold Shutter Doors To understand how bi-fold shutter doors work, you’ll need to familiarize yourself with their unique folding mechanism. Bi-fold shutter doors are designed to fold in a concertina-like manner, allowing them to open and close smoothly. This folding mechanism is what sets them apart from other types of folding doors. When it comes to the operation and maintenance of bi-fold shutter doors, they are relatively easy to use and require minimal upkeep. To open the doors, simply slide them along their track until they reach the desired position. Closing them is just as simple – slide them back in the opposite direction until they are fully closed. As for maintenance, regular cleaning with a mild detergent and lubricating the track will keep them in good working condition. In comparison to other types of folding doors, bi-fold shutter doors offer several advantages. They provide excellent insulation properties, helping to regulate temperature and reduce energy consumption. Additionally, their unique folding mechanism allows for maximum utilization of space without compromising on style or functionality. Now that you understand the basic mechanics of how bi-fold shutter doors work, let’s explore the components that make up these versatile and practical door systems without missing a beat. Exploring the Components of Bi-Fold Shutter Doors Exploring the components of bi-fold shutter doors reveals their intricate design. These doors consist of several important elements that allow them to function smoothly and efficiently. One key component is the folding mechanism, which enables the door panels to fold inwards or outwards when opening or closing. This mechanism ensures that the door can be easily operated without any hassle. Another crucial component is the operating system, which controls the movement of the door panels. It includes various hardware such as hinges, rollers, and tracks that enable smooth sliding and folding motion. The operating system is designed to bear the weight of the door panels while also allowing easy manoeuvrability. Understanding these components helps you appreciate how bi-fold shutter doors work seamlessly. The folding process involves a series of carefully coordinated movements facilitated by these components. As you open or close the doors, they smoothly glide along their tracks, folding neatly until they are fully opened or closed. By exploring these components, you gain insight into not only their intricate design but also how they contribute to the overall functionality of bi-fold shutter doors. Now let’s delve deeper into the fascinating world of ‘the folding process: how bi-fold shutter doors work’. The Folding Process: How Bi-Fold Shutter Doors Work Understanding the intricate design of bi-fold shutter doors reveals the fascinating process by which they smoothly fold and unfold. The operation of these doors is relatively simple yet highly efficient. To maintain their functionality, regular maintenance is essential. Common problems with bi-fold shutter doors include misalignment, sticking, or difficulty in folding and unfolding. The folding process of bi-fold shutter doors begins with unlocking them from their closed position. As you push or pull the leading edge, a series of interconnected panels will start to slide along a track system. This sliding motion allows the panels to stack neatly against each other, creating an accordion-like effect. To ensure smooth operation, it is crucial to keep the track system clean and free from debris that may hinder movement. Lubricating any movable parts can also help reduce friction and prevent wear over time. Now let’s transition into the subsequent section about sliding and opening: the functionality of bi-fold shutter doors. Once fully folded, these doors can be effortlessly slid open to reveal a wide opening that seamlessly connects indoor and outdoor spaces without any obstructions or barriers. Sliding and Opening: The Functionality of Bi-Fold Shutter Doors When sliding and opening bi-fold shutter doors, you’ll experience a seamless transition between indoor and outdoor spaces. These versatile doors not only add aesthetic appeal to your home but also offer several practical benefits. Here are five reasons why bi-fold shutter doors are worth considering: – Maintenance and care: Keeping bi-fold shutter doors in top condition is relatively easy. Regular cleaning with mild soap and water will ensure their longevity. – Energy efficiency: Bi-fold shutter doors provide excellent insulation, helping to keep your home cool in summer and warm in winter, which can potentially reduce energy costs. – Space-saving design: Unlike traditional sliding doors, bi-fold shutter doors fold neatly against the wall, maximizing the available space when fully open. – Enhanced natural light: The wide panels of glass on bi-fold shutter doors allow ample sunlight to flood into your living areas, creating a bright and airy atmosphere. – Flexible usage options: Whether you want to merge your indoor and outdoor spaces for entertaining or simply enjoy panoramic views from the comfort of your home, bi-fold shutter doors offer endless possibilities. With these advantages in mind, let’s explore the various benefits and applications of bi-fold shutter doors without skipping a beat. Benefits and Applications of Bi-Fold Shutter Doors To fully appreciate the benefits and applications of bi-fold shutter doors, you’ll be amazed at their ability to seamlessly connect indoor and outdoor spaces. The installation process is relatively simple and straightforward. A professional will come to your home or business and carefully measure the space where the doors will be installed. Once the measurements are taken, the bi-fold shutter doors can be custom-made to fit perfectly. Maintenance requirements for bi-fold shutter doors are minimal, making them
Are Window Shutters Outdated?

Are your window shutters stuck in the past? It’s time to rethink their timeless appeal. In this article, we’ll explore whether window shutters are outdated or if they continue to enhance your home’s aesthetic. Discover the versatility and functionality of shutters, and how they compare to other treatment options. Plus, learn how to incorporate shutters into modern design trends. Don’t dismiss them just yet – you may be surprised by the beauty and charm that can be achieved with window shutters. The Timeless Appeal of Window Shutters Window shutters have a timeless appeal that never goes out of style. They have been a staple in home design for centuries, and their enduring popularity speaks to their versatility and functionality. The historical significance of window shutters cannot be understated. In the past, shutters were not just decorative elements but also served practical purposes such as protecting homes from extreme weather conditions and providing privacy. Throughout history, window shutters have evolved in terms of materials, styles, and designs. From traditional wooden shutters to modern alternatives like vinyl or composite materials, there is a wide range of options available to suit any aesthetic preference. Whether you prefer the classic look of plantation shutters or the rustic charm of board-and-batten style, there is a shutter design that will complement your home’s architectural style. In addition to their historical significance and enduring popularity, window shutters can enhance your home’s aesthetic in various ways. They add character and depth to your windows while also providing control over natural light and ventilation. By adjusting the louvres or panels, you can easily regulate the amount of sunlight entering your space and maintain privacy without sacrificing natural light. Incorporating window shutters into your home’s design is a simple yet effective way to elevate its overall appearance without undertaking major renovations or costly upgrades. Enhancing Your Home’s Aesthetic with Shutters Adding shutters to your home can greatly improve its overall aesthetic. Not only do shutters enhance the visual appeal of your property, but they also offer a range of practical benefits. One such advantage is the ability to increase the value of your property. Well-designed and properly installed shutters can significantly boost the curb appeal of your home, making it more attractive to potential buyers or renters. Another advantage of adding shutters is their ability to maximise the benefits of natural light. Shutters allow you to control the amount of light that enters a room while still maintaining privacy. By adjusting the slats or opening the panels, you can let in just enough sunlight to create a warm and inviting atmosphere, without compromising on privacy. Moreover, shutters provide versatility and functionality that go beyond their aesthetic appeal. They come in various styles, colours, and materials, allowing you to choose one that complements your home’s architecture and personal style. Additionally, shutters can be customised to fit any window size or shape, ensuring a perfect fit for every room in your house. Versatility and Functionality of Shutters To make the most of your shutters, you can easily adjust the slats or panels to control the amount of light entering a room while still maintaining privacy. This versatility is one of the key benefits of window shutters. Unlike other treatment options like curtains or blinds, shutters allow you to customise the amount of light that filters into your space. Whether you want to enjoy a bright and airy ambience or create a cosy atmosphere, simply tilt the slats or open/close the panels to suit your preference. Not only do shutters offer customisation options for lighting, but they also provide functionality in terms of privacy. By adjusting the slats, you can block direct views from outside without completely sacrificing natural light. This feature is particularly useful if you live in a busy neighbourhood or have windows facing a street. In addition to their versatility and functionality, shutters have low maintenance requirements compared to other treatment options. Unlike curtains that need regular washing and blinds that accumulate dust easily, shutters are easy to clean with just a quick wipe-down using a damp cloth. Now that we’ve explored the versatility and functionality of window shutters, let’s delve into how they compare to other treatment options available on the market today… Comparing Window Shutters to Other Treatment Options When it comes to choosing the right treatment options for your windows, you’ll find that shutters offer a timeless and elegant look that can easily complement any style of decor. Not only do they provide privacy and control over sunlight, but shutters also have several advantages when compared to other window treatments: Durability: Unlike blinds, which can easily get damaged or tangled, shutters are built to last. Made from sturdy materials like wood or vinyl, they can withstand everyday wear and tear without losing their functionality or appeal. Versatility: While curtains may offer more fabric choices, shutters come in a variety of styles, colours, and finishes to suit any aesthetic preference. Whether you prefer a classic plantation shutter or a sleek contemporary design, there’s an option that will enhance the overall look of your space. Easy Maintenance: Compared to curtains that need regular washing or blinds that require constant dusting, shutters are remarkably low-maintenance. A quick wipe with a damp cloth is usually all it takes to keep them looking clean and fresh. Energy Efficiency: Shutters provide excellent insulation by creating a barrier between the interior of your home and the outside elements. This helps regulate temperature and reduces energy consumption by keeping heat out during summer months and retaining warmth during winter. While curtains may have their own set of advantages over shutters such as providing softness and texture to a room, it’s clear that shutters offer numerous benefits that make them an attractive choice for window treatments. Incorporating shutters into modern design trends allows you to create a seamless blend of traditional elegance with contemporary
Remote Control For Your Window Shutters

Imagine having the power to effortlessly control your window shutters with just the touch of a button. With our remote control system, you can transform your home into a haven of convenience and functionality. No more struggling with manual operation or compromising on comfort. From easy installation to customisable experiences, this technology allows you to enhance your living space like never before. Say goodbye to wasted energy and hello to increased efficiency. It’s time to take charge with remote control for your window shutters. The Convenience of Remote Control You’ll love the convenience of controlling your window shutters with a remote. With this convenient technology, you can easily adjust the position of your shutters without having to manually operate them. Imagine sitting on your couch, enjoying a movie or reading a book, and being able to effortlessly open or close your shutters with just the press of a button. No more getting up and walking across the room to adjust them manually. The benefits of remote control for your window shutters are numerous. Firstly, it saves you time and effort. Instead of going from window to window, you can control all the shutters in your home from one central location. This is especially useful if you have multiple windows or hard-to-reach areas. Additionally, remote control provides added security for your home. You can easily close all the shutters at once when leaving the house or at night, providing an extra layer of protection against potential intruders. Enhancing Home Functionality with Remote Shutters Enhancing home functionality is easy with the convenience of remote-operated shutters. With remote shutters, you can not only control the amount of light that enters your home but also improve its security and enhance privacy. When it comes to home security, remote shutters play a crucial role in keeping your property safe. By simply closing the shutters with a click of a button, you can deter potential intruders and protect your belongings. Additionally, by adjusting the height or angle of the shutters, you can maintain privacy without compromising on natural light. Remote-controlled window shutters offer a seamless integration into your daily routine. The installation process is straightforward and hassle-free, allowing you to enjoy all the benefits without any inconvenience. Once installed, these shutters seamlessly integrate with your existing smart home system, enabling easy operation through voice commands or smartphone apps. Easy Installation and Integration Installing and integrating these technologically advanced shutters into your home is a seamless process. With smart home automation becoming more prevalent, motorised blinds have become an essential element in creating a modern and convenient living space. To begin, the installation of these smart shutters is straightforward. You can easily mount them on any window frame without the need for complex wiring or extensive modifications to your home. Once installed, the integration process is equally effortless. These motorised blinds seamlessly connect to your existing smart home system, allowing you to control them remotely from anywhere using just your smartphone or voice commands. By incorporating smart technology into your window shutters, you gain full control over the natural light entering your space. With a simple touch of a button or a voice command, you can adjust the blinds to let in more sunlight or create privacy with ease. This level of convenience enhances not only the functionality of your home but also improves energy efficiency by optimising natural lighting throughout the day. As you explore customising your window shutter experience, you’ll discover additional features that further elevate their usability and aesthetics. From scheduling automatic adjustments based on sunrise and sunset times to setting personalised scenes that align with different moods or activities – each aspect adds another layer of personalisation to fit your lifestyle seamlessly. Customising Your Window Shutter Experience To truly personalise your experience, take advantage of the various customisable features available for these smart blinds. With the ability to adjust the aesthetics of your window shutters, you can create a space that truly reflects your style and personality. Here are some options to consider: – Choose from a wide range of colours and patterns to match your existing decor or make a bold statement. – Customise the size and shape of your window shutters to fit perfectly with any window in your home. – Integrate your smart blinds with other smart home systems, allowing you to control them through voice commands or an app on your smartphone. – Set personalised schedules for opening and closing your window shutters, so they automatically adjust throughout the day based on your preferences. – Create scenes that combine the operation of multiple devices in your home, such as turning on specific lights and adjusting the blinds at the same time. By customising these aspects of your window shutter experience, you can enhance both the functionality and aesthetic appeal of your space. And speaking of enhancing functionality, let’s explore how remote shutters can also increase energy efficiency in your home… Increasing Energy Efficiency with Remote Shutters By integrating smart blinds into your home, you can effortlessly manage the amount of natural light that enters your space, resulting in increased energy efficiency. With remote shutters, you have complete control over the level of privacy in your home. Whether you want to enjoy an unobstructed view or create a cosy and intimate atmosphere, simply adjust the position of your window shutters with the touch of a button. Not only do remote shutters provide convenience and aesthetics, but they also help reduce noise pollution. By closing the shutters completely, you can block out external sounds such as traffic or neighbourhood chatter. This creates a peaceful environment where you can relax and focus without any distractions. In addition to enhancing privacy and reducing noise pollution, remote shutters contribute to energy efficiency by regulating the amount of sunlight that enters your space. During hot summer months, keeping the shutters closed during peak sun
Loft Conversion Room Ideas

Are you tired of the wasted space in your loft? Well, get ready to be amazed because we have some mind-blowing loft conversion room ideas just for you! Turn that dull and empty area into a functional and cosy home office where productivity thrives. Or why not transform it into a stylish guest bedroom that will leave your visitors in awe? The possibilities are endless, so let’s dive in and explore the exciting world of loft conversions together! Home Office Design Ideas If you’re looking for a productive workspace, consider creating a home office in your loft conversion. With the right design choices, you can transform your loft into a comfortable and efficient work environment. One key aspect to consider is choosing ergonomic furniture options. Investing in an adjustable desk and an ergonomic chair will ensure proper posture and reduce the risk of back pain or discomfort during long hours of work. Additionally, incorporating storage solutions, such as shelves or cabinets, will help keep your workspace organised and clutter-free. Another important factor to consider when designing your home office is maximising natural light. Natural light has been proven to increase productivity and boost mood. To take advantage of this, position your desk near a window or install skylights if possible. You can also use sheer curtains or blinds that allow sunlight to filter in while still providing privacy. By creating a well-designed home office with ergonomic furniture options and maximising natural light, you’ll be setting yourself up for success in getting work done efficiently and comfortably. Now that we’ve covered some great ideas for your home office design, let’s move on to the next section: guest bedroom inspiration. Guest Bedroom Inspiration Looking to create a cosy and inviting space for your guests? When it comes to guest bedroom decor, there are plenty of small-space solutions that can help you make the most out of your limited area. Start by choosing a colour palette that promotes relaxation and warmth, such as soft neutrals or soothing blues. Opt for multifunctional furniture pieces like a daybed with storage underneath or a fold-out sofa bed. This way, you can accommodate overnight visitors while still having extra storage space for their belongings. Adding some personal touches like fluffy pillows, fresh bedding, and ambient lighting can instantly transform the room into a welcoming retreat. Consider incorporating elements of nature through potted plants or floral artwork to bring in a sense of tranquillity. Now that you have created the perfect guest bedroom, let’s move on to playroom design concepts without skipping a beat. Playroom Design Concepts When it comes to designing a playroom, it’s essential to create a space that is both fun and functional for children. After all, this is where they will spend hours of their time playing and exploring their imagination. So, how can you make the perfect playroom? Here are some indoor playground ideas and toy storage solutions to get you started: – Create designated zones: Divide the room into different areas such as a craft corner, reading nook, and imaginative play area. This allows for easy organisation and encourages various types of play. – Incorporate interactive elements: Install a climbing wall or slide to add an element of adventure. You can also consider adding sensory activities like a ball pit or trampoline for endless fun. – Think about storage: Invest in practical toy storage solutions like shelves with bins or baskets. This keeps toys organised and easily accessible while teaching kids the importance of tidying up. With these ideas in mind, you can design a playroom that not only stimulates your child’s creativity but also provides ample storage for their toys. Now let’s move on to cosy reading nook ideas… Cosy Reading Nook Ideas To create a cosy reading nook in your playroom, try adding a comfortable armchair and a bookshelf filled with your child’s favourite books. A reading corner is the perfect addition to any playroom, providing a quiet and inviting space for your little one to escape into the world of stories. Start by selecting a comfortable armchair or bean bag that your child can sink into while immersing themselves in their favourite books. Make sure to choose one that fits well within the space and complements the overall decor of the room. Next, focus on organising the bookshelf in an appealing way. Arrange the books by category or theme to make it easier for your child to find what they are looking for. You can also incorporate fun bookends or small decorations to add visual interest. Consider adding some soft cushions or throw pillows near the chair for added comfort. By creating a cosy reading nook, you encourage literacy skills and foster a love for reading in your child. It’s important to provide them with an environment that makes them feel safe and excited about diving into new worlds through books. Now, let’s transition into creating a spacious entertainment area where your child can engage in various activities without feeling cramped or restricted. Creating a Spacious Entertainment Area For a spacious entertainment area, consider adding versatile furniture that can be easily rearranged to accommodate different activities. This will allow you to create the perfect setting for outdoor kitchen designs and home theatre ideas. Here are some tips to help you make the most of your space: – Invest in modular seating: Look for sofas and chairs that can be arranged in various configurations, allowing you to create different seating arrangements depending on the occasion. – Choose multifunctional pieces: Opt for coffee tables or ottomans with hidden storage compartments, so you can store extra blankets or pillows when they’re not in use. – Use movable partitions: If you want to separate your outdoor kitchen from your home theatre area, consider using movable partitions or screens that can be easily adjusted based
Do Interior Shutters Add Value To The Home?

Are you tired of feeling like your home lacks that certain something? Well, look no further! Interior shutters are here to save the day and add value to your humble abode. These charming window treatments not only enhance curb appeal and make a stellar first impression, but they also improve energy efficiency, increase privacy and security, and bring a timeless touch to any design scheme. Get ready to fall in love with your home all over again as we explore the undeniable benefits of interior shutters. Enhancing Curb Appeal and First Impressions If you want to make a great first impression and enhance your home’s curb appeal, interior shutters are a fantastic addition. Not only do they add beauty and style to your windows, but they also have the potential to boost the value of your property. When potential buyers drive by, they will be immediately drawn in by the charm and elegance that interior shutters bring to your home’s exterior. The sleek design of interior shutters adds a touch of sophistication that can greatly improve the overall look of your house. Whether you choose traditional wooden shutters or modern vinyl ones, they create a sense of warmth and cosiness that is highly appealing. With their clean lines and versatility, shutters can complement any architectural style. In addition to enhancing curb appeal, interior shutters can attract potential buyers who are looking for homes with added value. Many people recognize the benefits of having adjustable window coverings that provide privacy and control over natural light. By investing in quality shutters, you are demonstrating attention to detail and commitment to maintaining your home. Improving Energy Efficiency and Insulation Improving energy efficiency and insulation can be enhanced by adding interior shutters to your home. Not only do they provide an aesthetic appeal, but they also offer practical benefits that can help reduce your utility bills and minimize heat loss. Here’s how interior shutters contribute to improving energy efficiency: Insulation: Interior shutters act as an additional layer of insulation for your windows. When closed, they create a barrier between the indoor and outdoor environments, preventing heat transfer in both hot summers and cold winters. Light control: By adjusting the angle of the slats, you can regulate the amount of natural light entering your home. This allows you to minimize heat gain during warmer months while still enjoying sufficient lighting. Ventilation management: Interior shutters allow you to control airflow through your windows. Opening them partially can promote air circulation, reducing the need for excessive use of fans or air conditioning. By incorporating interior shutters into your home, you not only enhance its energy efficiency but also create a more comfortable living environment by maintaining optimal temperature levels throughout the year. When it comes to increasing privacy and security… Increasing Privacy and Security When considering increasing privacy and security, you can install window films for an effective solution. Window films not only provide added privacy by reducing the visibility from the outside, but they also offer increased home comfort and security benefits. These films help to block harmful UV rays, keeping your home cooler in the summer and warmer in the winter. With improved insulation properties, they can reduce energy costs by preventing heat transfer through your windows. Additionally, window films are known to reduce outside noise, creating a quieter and more peaceful environment inside your home. But privacy and security are not the only benefits of installing window films. They also serve as a versatile design element that can enhance the overall aesthetics of your space. With various styles, patterns, and textures available, you can choose a film that complements your interior decor while adding a touch of elegance to your windows. The timeless appeal of window films makes them a valuable addition to any home. Creating a Timeless and Versatile Design Element By installing window films, you can create a timeless and versatile design element that enhances the overall aesthetics of your space. Window films offer a wide range of design options to suit any style or preference. Whether you prefer a sleek and modern look or a more traditional and elegant feel, there is a window film design that will complement your interior decor perfectly. From decorative patterns to frosted finishes, the possibilities are endless. Not only do window films add beauty to your space, but they also require minimal maintenance. Unlike curtains or blinds that need frequent cleaning and upkeep, window films are easy to maintain. A simple wipe with a damp cloth is usually sufficient to keep them clean and looking their best. This makes them an excellent choice for busy homeowners who want to enjoy the benefits of stylish windows without the hassle of regular maintenance. In addition to their aesthetic appeal and low maintenance requirements, installing window films can potentially provide you with a significant return on investment. The added beauty and functionality they bring to your space can increase its value in the eyes of potential buyers if you decide to sell your home in the future. So not only do window films enhance the visual appeal of your space, but they also have the potential to pay off financially down the line. Potential Return on Investment Investing in window films can potentially provide you with a significant return on your investment. By maximizing profits and making a long-term investment, window films can offer numerous benefits that make them worth considering. When it comes to maximizing profits, window films are a smart choice. They help reduce energy costs by blocking out harmful UV rays and preventing heat gain during the summer. This means lower cooling bills and decreased strain on your HVAC system. Additionally, window films enhance insulation, keeping your home warmer in the winter and reducing heating expenses. These cost savings add up over time, allowing you to maximize your profits while enjoying increased comfort all
Do Wooden Shutters Keep Heat In?
Do you dream of cosy, warm winters? Discover the secret to heat retention with wooden shutters. These charming window coverings not only add style and elegance to your home but also possess impressive insulating properties. By reducing heat loss through windows, they help control temperature and enhance energy efficiency. With wooden shutters, you can keep the chilly drafts at bay and create a snug haven for yourself. Let’s explore the benefits and tips for maximising heat retention with these remarkable additions to your windows. Insulating Properties of Wooden Shutters Yes, wooden shutters can help keep heat in your home. The thermal insulation of wooden shutters is one of their key benefits when it comes to conserving heat. When closed tightly, these shutters create a barrier between the inside and outside of your home, preventing heat from escaping through the windows. The insulating properties of wooden shutters are due to the material itself. Wood is a natural insulator that can effectively trap air within its structure. This trapped air acts as a buffer against temperature changes, helping to maintain a comfortable indoor climate. Furthermore, wooden shutters have the ability to control the amount of sunlight entering your home. By adjusting the slats or opening and closing the panels, you can regulate the amount of heat gained from direct sunlight during hot summer days. In addition to keeping heat in during colder months, wooden shutters also contribute to reducing heat loss through windows. As we move into discussing this topic further, it’s important to note that there are multiple ways in which shutters can aid in minimising energy loss and improving overall energy efficiency in your home. So let’s explore how they play a role in reducing heat loss through windows without delay! Reducing Heat Loss Through Windows Insulating your windows can help trap warmth inside your home. By implementing window insulation techniques, you can reduce heat loss and create a more comfortable living space. Consider the following options to maximise the efficiency of your windows: – Weatherstripping: Seal any gaps or cracks around your windows with weatherstripping to prevent drafts and heat loss. – Window film: Apply a clear window film to create an additional layer of insulation and reduce heat transfer. – Draft stoppers: Place draft stoppers along the bottom of your windows to block cold air from entering and warm air from escaping. – Thermal curtains: Invest in thermal curtains that are specifically designed for heat retention. These curtains have insulating properties that help keep warmth inside during colder months. By incorporating these window insulation techniques, you can significantly decrease heat loss through your windows and improve energy efficiency in your home. Now, let’s move on to controlling temperature and enhancing energy efficiency without compromising comfort. Controlling Temperature and Energy Efficiency To control the temperature and improve energy efficiency in your home, you should consider using programmable thermostats and installing window blinds or shades. These simple steps can go a long way in maximising energy savings and maintaining a comfortable indoor temperature. Programmable thermostats allow you to set different temperatures for different times of the day, so you can adjust the heating or cooling based on when you’re at home or away. This helps to reduce unnecessary energy consumption and lowers your utility bills. Additionally, by setting lower temperatures during the night, you can enjoy a cosy sleep without overheating your room. Window blinds or shades also play a significant role in regulating the indoor temperature. By closing them during hot summer days, you prevent excessive sunlight from entering your home, reducing the need for air conditioning. In winter, keeping them closed at night helps to retain heat inside, minimising heat loss through windows. Now that we’ve covered how to control temperature and improve energy efficiency through thermostats and window treatments, let’s move on to discuss the benefits of wooden shutters for heat retention without skipping a beat! Benefits of Wooden Shutters for Heat Retention By using wooden shutters, you can effectively maintain a comfortable temperature in your home while reducing energy consumption. The thermal efficiency of wooden shutters plays a significant role in retaining heat and preventing it from escaping. When closed, the shutters provide an additional layer of insulation, acting as a barrier against the cold air outside. This helps to minimise heat loss and keeps your home warm during colder months. The impact of wooden shutters on heating bills cannot be overlooked. By keeping the heat trapped inside, you won’t need to rely as heavily on your heating system, ultimately saving energy and lowering costs. Wooden shutters are excellent at blocking drafts and preventing cold air from seeping into your living spaces, allowing you to enjoy a cosy environment without constantly adjusting the thermostat. Now that you understand the benefits of wooden shutters for heat retention, let’s explore some tips for maximising their effectiveness even further. These practical suggestions will help ensure that your shutters are working at their best to keep warmth inside your home during colder seasons without having to resort to turning up the heat excessively or spending more on energy bills. Transition: Now that we’ve covered why wooden shutters are beneficial for retaining heat, let’s delve into some useful tips for maximising their effectiveness even further without any complicated steps or techniques required. Tips for Maximising Heat Retention with Wooden Shutters One way you can enhance the effectiveness of your wooden shutters in retaining warmth is by using weatherstripping to seal any gaps or cracks around the window frames. By doing this, you are maximising energy savings and ensuring that your shutters provide a cost-effective insulation option for your home. Weatherstripping is a simple and affordable solution that helps prevent heat loss through small openings around your windows. It consists of adhesive-backed foam strips or rubber seals that you can easily apply to the edges
How To Fix Broken Blinds Pull Cord
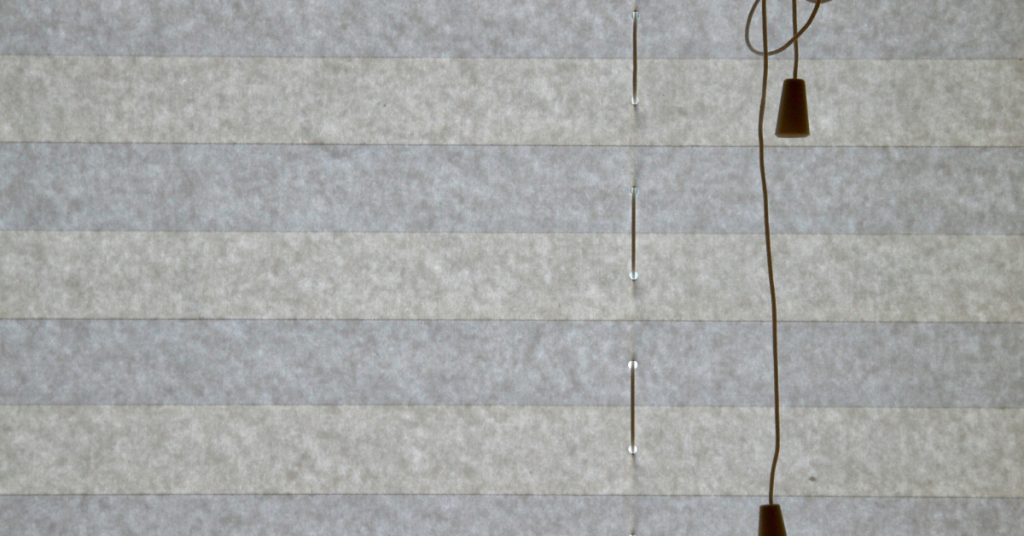
Did you know that approximately 90% of blinds have a pull cord? That means there’s a good chance you’ve encountered the frustrating issue of a broken blind pull cord at some point. But fear not! With a few simple steps, you can fix it yourself and save both time and money. In this article, we will guide you through the process of repairing your broken blinds pull cord. First, we’ll help you assess the damage to determine the best course of action. Then, we’ll provide you with a list of necessary tools so that you’re fully equipped for the job. Whether your cord has become detached or is simply stuck, we’ve got solutions for both scenarios. Not only will we show you how to fix your broken blinds pull cord, but we’ll also provide tips on preventing future issues. By following our expert advice, you can ensure smooth operation and longevity for your blinds. So let’s get started and get those blinds working like new again! Assessing the Damage Take a close look at the pull cord to see if it’s frayed or snapped, making it impossible to raise or lower your blinds. This is a common problem that can occur over time due to wear and tear. If you notice any signs of damage on the pull cord, it’ll need to be replaced in order for your blinds to function properly again. To fix this issue, you’ll need a few tools and materials. First, gather a replacement pull cord that matches the length and thickness of the original one. You’ll also need a ladder or step stool to reach the blinds, as well as a screwdriver and scissors. Once you’ve assessed the damage and gathered all necessary tools, you can proceed with fixing your broken blinds pull cord. Gathering the Necessary Tools To successfully address the issue at hand, it’s important to gather all the required tools first. Before you begin fixing your broken blinds pull cord, make sure you have the following items handy: – A replacement cord – Scissors or a utility knife – A ladder or step stool (if needed) – A screwdriver The replacement cord should be similar in thickness and material to the original one. Having scissors or a utility knife will help you cut the old cord and trim the new one to an appropriate length. A ladder or step stool may be necessary if your blinds are mounted high up. Lastly, a screwdriver will come in handy for removing any screws that hold the blind mechanism in place. Once you have gathered all of these tools, you can move on to reattaching a detached cord. This process involves carefully threading the new cord through the pulley system and tying appropriate knots to secure it in place. Reattaching a Detached Cord Now let’s dive into the process of putting the cord back in its rightful place, ensuring your blinds are once again fully functional. First, you’ll need to locate the end of the detached cord. This is usually found inside the bottom rail or at the top of the blinds. Once you’ve found it, take a pair of pliers and gently pull on it to create some slack. Next, thread the loose end of the cord through any necessary holes or loops in order to reattach it to the blind mechanism. Make sure to follow any existing paths that were set by the manufacturer. If there are no existing paths, you may need to use a screwdriver or other tool to remove any covers that are blocking access. Once you have successfully reattached the cord, test it by gently pulling on it. The blinds should respond accordingly and move up and down smoothly. If everything is working as expected, proceed to fix a stuck cord by following our next guide. Fixing a stuck cord can be just as simple as reattaching a detached one. Keep reading for step-by-step instructions on how to resolve this common issue with your blinds. Fixing a Stuck Cord Resolving a stuck cord is like untangling a stubborn knot, requiring patience and gentle manoeuvring to restore smooth functionality. To fix a stuck cord on your blinds, start by lowering the blinds completely and inspecting the cord for any visible obstructions or tangles. If you spot any debris or knots, gently remove them using your fingers or a pair of tweezers. Next, check if the cord is properly aligned within the pulley system. Sometimes, the cord can become misaligned, causing it to get stuck. Adjust the position of the cord within the pulleys until it moves freely. If these steps don’t resolve the issue, try lubricating the pulleys with a silicone-based spray or oil to reduce friction and help loosen up any dirt or grime that may be causing the sticking. Be sure to wipe away any excess lubricant after applying. To prevent future cord issues, make sure to keep your blinds clean and free from dust and debris. Regularly inspect and maintain your blinds by checking for loose cords or worn-out mechanisms. Additionally, avoid pulling on the cords too forcefully as this can cause them to become tangled or break. By following these simple steps and taking preventive measures, you can ensure that your blinds’ pull cords remain in good working condition for years to come. Preventing Future Cord Issues Take a proactive approach to ensure the smooth operation of your window treatments by keeping an eye out for potential tangles and knots that can trip up your blinds. Prevention is key when it comes to avoiding future cord issues. Start by regularly inspecting the pull cord for any signs of fraying or wear and tear. If you notice any damage, it’s important to replace the cord immediately to prevent further problems. To minimize the risk of
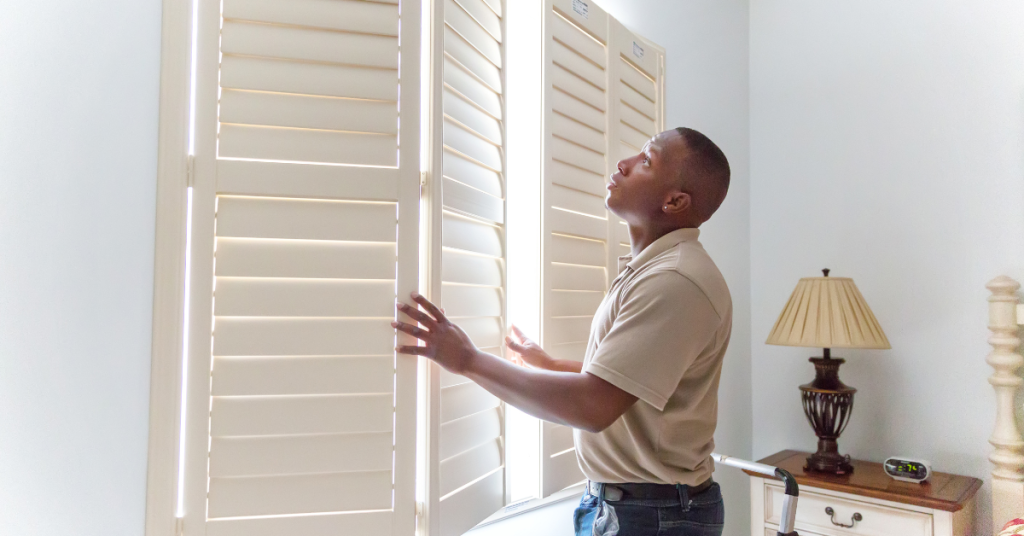
How To Fit Vertical Blinds In A Bay Window
Are you looking to add a touch of elegance and functionality to your bay window? Like a well-tailored suit that complements your physique, fitting vertical blinds in a bay window can transform the entire look and feel of your space. With their sleek design and ability to control light, these blinds are the perfect solution for any bay window. In this article, we will guide you through the process of measuring your bay window accurately, choosing the right vertical blinds to match your style and needs, preparing for installation with expert tips, and finally installing the blinds seamlessly. We’ll also provide you with some finishing touches and maintenance tips to keep your blinds looking pristine for years to come. Whether you’re an experienced DIY enthusiast or new to home improvement projects, this step-by-step guide will empower you to tackle fitting vertical blinds in a bay window with confidence. Let’s dive in and create a stunning focal point in your space! Measuring Your Bay Window Now it’s time to get up close and personal with your beautiful bay window, so you can perfectly measure and fit those stunning vertical blinds. Start by gathering your measuring tools: a tape measure, pencil, and paper. Begin by measuring the width of each individual window in your bay. Measure from the inside edge of one frame to the inside edge of the opposite frame. Be sure to take three measurements: at the top, middle, and bottom of each window. Write down the smallest measurement as this will be your width measurement. Next, measure the height of each window. Again, take three measurements from the top to the bottom of each window and write down the smallest measurement as your height measurement. To ensure a proper fit, add an extra inch or two to both your width and height measurements. With accurate measurements in hand, you’re now ready to move on to choosing the right vertical blinds that will complement your bay window perfectly. Now that you have precise measurements for your bay windows, it’s time to select vertical blinds that will enhance their beauty while providing functionality. Choosing the Right Vertical Blinds First, you need to select the perfect blinds that will effortlessly complement your beautiful bay window. When choosing vertical blinds for your bay window, there are a few key factors to consider. Firstly, think about the material of the blinds. You can choose from a variety of materials such as fabric, vinyl, or wood. Fabric blinds offer a soft and elegant look, while vinyl is more durable and easy to clean. Wood blinds add warmth and sophistication to any room. Next, consider the colour and pattern of the blinds. It’s important to select a colour that matches or complements your existing decor. Neutral colours like white or beige are versatile options that blend well with any style. If you want to make a bold statement, opt for vibrant colours or patterns that reflect your personal taste. Additionally, take into account the size and width of the slats on the vertical blinds. Wider slats provide a modern and minimalist look, while narrower ones create a more traditional aesthetic. Now that you have chosen the perfect vertical blinds for your bay window, it’s time to prepare for installation by gathering all the necessary tools and ensuring accurate measurements of your windows. Preparing for Installation Before installing your new window coverings, take a moment to gather all the necessary tools and make sure you have precise measurements for a seamless installation process. You’ll need a tape measure, drill or screwdriver (depending on the type of mounting hardware), pencil, level, and a ladder or step stool if needed. Start by measuring the width and height of each individual window within your bay window. It’s important to measure both the inside recess and outside frame to determine the best method of mounting for your blinds. Next, check that all necessary brackets and clips are included with your vertical blinds kit. These will be used to secure the headrail in place. If any parts are missing, contact the manufacturer before proceeding with the installation. Once you have gathered your tools and confirmed that everything is in order, it’s time to prepare the windows themselves. Clean the windows thoroughly to remove any dirt or debris that could interfere with proper installation. Then, mark the desired position for each bracket using a pencil and level for accuracy. Preparing for installation involves gathering tools, taking precise measurements, checking for missing parts in your vertical blind kit, cleaning the windows, and marking bracket positions. With these steps completed successfully, you’re ready to move on to installing your vertical blinds without any issues! Installing the Vertical Blinds Let’s jump right into the installation process and get those beautiful vertical blinds up in no time! Before you begin, make sure you have all the necessary tools handy: a drill, screws, a screwdriver, a measuring tape, and a level. Start by attaching the mounting brackets to the wall or window frame. Hold one bracket against the top corner of your bay window and mark where you need to drill pilot holes. Once you’ve done that, secure the bracket with screws. Repeat this process for each bracket. Next, insert the headrail of the vertical blind into the mounting brackets. Make sure it fits snugly and is level using a bubble level. Then, attach any valances or coverings that came with your blinds to give them a polished look. Once everything is securely in place, test the blinds by opening and closing them to ensure they operate smoothly. Adjust any tilt controls if necessary. Now that your vertical blinds are installed, let’s move on to finishing touches and maintenance tips for keeping them looking their best without skipping a beat! Finishing Touches and Maintenance Tips
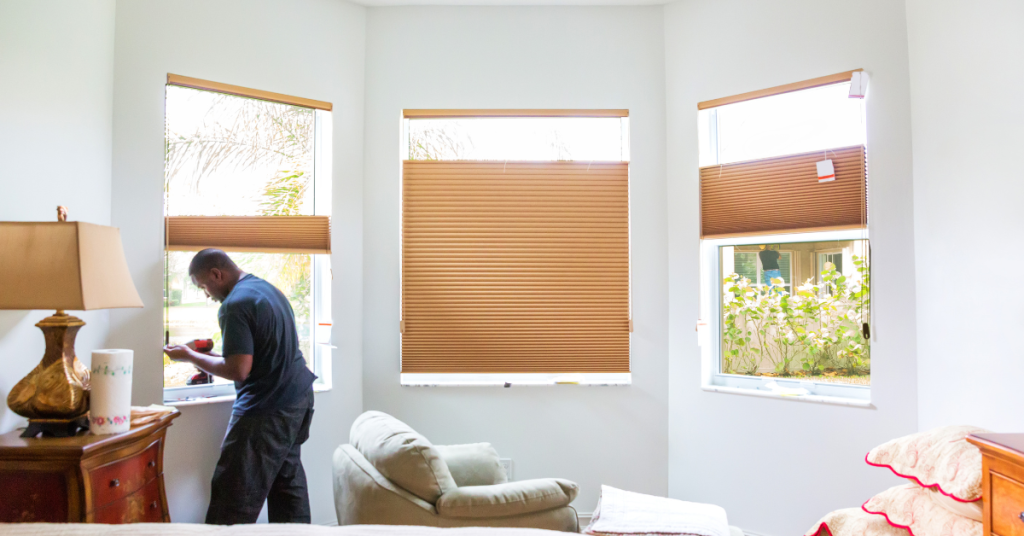
How To Fit Blinds To Upvc Windows
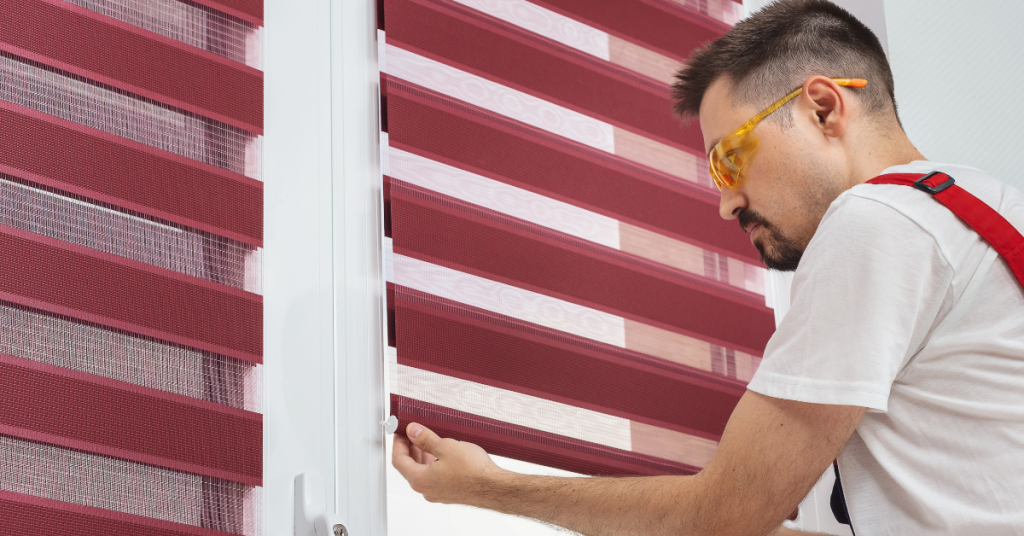
Did you know that 85% of homeowners with UPVC windows struggle to find the perfect blinds that fit seamlessly? If you’re one of them, worry no more! This article will guide you through the process of fitting blinds to your UPVC windows, ensuring a flawless and functional finish. First things first, it’s crucial to measure your UPVC windows accurately. Taking precise measurements will guarantee a snug fit for your blinds. Once you have the measurements, it’s time to choose the right blinds specifically designed for UPVC windows. With a wide range of styles and materials available, you can find the perfect match to enhance both privacy and aesthetics in your home. Installing mounting brackets is the next step in this process. These brackets provide a secure foundation for your blinds. Attaching the blinds to these brackets is easy and straightforward, allowing for quick installation without any hassle. Finally, adjusting and testing the blinds is essential to ensure proper functionality. With these simple steps and helpful tips, fitting blinds to your UPVC windows has never been easier or more efficient. Say goodbye to ill-fitting curtains or flimsy blinds – it’s time to give your UPVC windows the treatment they deserve! Measuring Your UPVC Windows Now, let’s grab your measuring tape and carefully assess the dimensions of your UPVC windows to ensure a perfect fit for your blinds. Start by measuring the width of the window frame from left to right at three different points: the top, middle, and bottom. Take note of the smallest measurement as this will be crucial for a snug fit. Next, measure the height of the window frame from top to bottom in three places: left side, centre, and right side. Again, record the smallest measurement. To ensure accuracy, it’s recommended to double-check all measurements before making any purchases. It’s also important to consider whether you want your blinds inside or outside mounted. Inside mounting provides a sleeker look but requires precise measurements so that they fit within the window frame. Outside mounting offers more flexibility in terms of size but may not provide as clean a finish. With these measurements in hand, you can now move on to choosing the right blinds for your UPVC windows. From roller blinds to Venetian blinds, there are various options available that can enhance both privacy and aesthetics while perfectly complementing your UPVC windows’ style and colour scheme. So let’s dive into exploring the wide range of blind choices suitable for UPVC windows! Choosing the Right Blinds for UPVC Windows When it comes to selecting the perfect window treatment for your UPVC windows, you’ll want to take into consideration factors such as style, functionality, and compatibility with your existing decor. One popular option for UPVC windows is blinds. Blinds offer a sleek and modern look while providing excellent light control and privacy. Before choosing blinds for your UPVC windows, it’s important to measure them accurately to ensure a proper fit. Once you have the measurements, you can start exploring different blind styles that will complement your windows and enhance the overall aesthetic of your space. Venetian blinds are a versatile choice that allows you to control the amount of light entering your room by adjusting the slats. Roller blinds are another great option as they provide a clean and minimalist look while offering easy operation. If you prefer more insulation or blackout capabilities, consider opting for cellular shades or Roman blinds. Remember to choose blinds that are specifically designed for UPVC windows as they will come with mounting brackets that easily attach to the frames. This ensures a secure installation without damaging your window frames. With the right blinds chosen, you can now move on to installing the mounting brackets and completing the look of your UPVC windows seamlessly. Installing the Mounting Brackets To effortlessly enhance the overall aesthetic of your space, it’s time to securely install the mounting brackets for your chosen blinds. This step is crucial as it ensures that your blinds are properly supported and will stay in place for years to come. Before you begin, make sure you have all the necessary tools on hand: a drill, screws, a screwdriver, and a measuring tape. Start by measuring the width of your window frame to determine where to position the brackets. Typically, they should be placed about 3 inches from each end of the frame. Mark these spots with a pencil. Next, take one of the brackets and hold it against the marked spot on the frame. Make sure it’s level before drilling pilot holes into the frame. Once you’ve done that, secure the bracket in place using screws. Repeat this process for the other bracket on the opposite side of the window frame. Double-check that both brackets are level and firmly attached before moving on to attaching the blinds. With your mounting brackets securely in place, you’re now ready to attach your chosen blinds. Attaching the Blinds to the Brackets Once the mounting brackets are securely in place, it’s time to effortlessly attach your chosen blinds and bring a touch of elegance to your space. Start by holding the blind header rail against the brackets, making sure that the hooks on the rail line up with the brackets. Slide the blind into place, ensuring a snug fit. You may hear a click or feel some resistance as the blind locks into position. Next, gently pull down on the control cord or chain to test if your blinds are functioning properly. If they move smoothly and without any obstructions, you’re ready to proceed. However, if you encounter any issues such as difficulty raising or lowering the blinds, make sure they are properly aligned with the brackets before continuing. To ensure proper functionality, adjust both sides of each bracket simultaneously until your blinds hang evenly and align
How To Remove Roman Blinds

Are you tired of your old, outdated Roman blinds cramping your style? Well, get ready to liberate your windows with our foolproof guide on how to remove Roman blinds! This step-by-step tutorial will have those blinds off and out of your life in no time. Imagine the sheer satisfaction of effortlessly detaching those drab blinds from their mounting brackets, like a superhero saving the day. With just a few simple tools and some know-how, you’ll be able to bid farewell to those pesky blind cords or chains that always seem to get tangled up. But it doesn’t stop there! We’ll also walk you through the process of safely removing the blinds from your window frame, leaving you with a blank canvas for new and exciting window treatments. So say goodbye to dull and hello to fabulous as we show you exactly how to remove Roman blinds like a pro! Gathering the Necessary Tools and Materials Get ready to gather all the tools and materials you’ll need to easily remove those pesky Roman blinds! Removing Roman blinds may seem like a daunting task, but with the right tools and materials, it can be a breeze. First things first, you’ll need a screwdriver, preferably a flathead or Phillips head depending on the type of screws used in your blinds. Additionally, grab a step ladder to reach those high windows safely. Next, get some pliers to help with any stubborn screws or brackets that may need loosening. In terms of materials, make sure you have a small bucket or container to hold all the screws and other small parts you’ll be removing. This will prevent them from getting lost or misplaced during the process. You might also want to have some painter’s tape handy so you can label each piece as you remove it. This will make reinstallation much easier later on. Now that you’ve gathered all your tools and materials, let’s move on to understanding the anatomy of Roman blinds. Understanding the Anatomy of Roman Blinds Understanding the intricate structure of these beautiful window coverings can truly ignite a sense of wonder and appreciation. Roman blinds are composed of several key components that work together to create their unique functionality. At the top, you’ll find a headrail, which houses the mechanism responsible for raising and lowering the blinds. This mechanism is typically operated by a cord or chain system, allowing for easy adjustment. Moving down, you’ll see horizontal rods called dowels or battens that run across the width of the blind. These rods provide stability and help to create those characteristic folds when the blinds are raised. Attached to each dowel are fabric panels, known as slats or ribs, which hang vertically when the blinds are fully extended. These slats can be made from various materials such as polyester or cotton blends, giving you options when it comes to style and durability. Now that you have a better understanding of how Roman blinds are structured, let’s move on to releasing them from their mounting brackets. By doing so, you’ll gain access to other essential parts that need attention in order to safely remove your blinds without causing any damage. Releasing the Blinds from the Mounting Brackets Once you release the blinds from their mounting brackets, it’s like setting a caged bird free to soar through the open sky. This step is crucial in removing Roman blinds as it allows you to detach them completely from the window frame. To begin, locate the small plastic or metal clips that secure the blinds to the brackets. These clips may be located on either side of the blind or at the bottom. Gently press and hold these clips while simultaneously lifting up the blind. You’ll feel a slight resistance as you do this, but don’t worry, it’s just the blind being released from its hold. As you lift up, keep your hand steady and slowly guide the blind out of the brackets. Take care not to pull too forcefully, as this could damage both the blind and your window frame. Once freed from its mounting brackets, your Roman blind is now ready for further disassembly. Next comes detaching the blind cord or chain, which we’ll explore in detail in our next section. By releasing these cords or chains, you’ll ensure the complete removal of your Roman blinds without leaving any traces behind. Detaching the Blind Cord or Chain To truly set your windows free, it’s time to release the cord or chain that holds your blinds in place. Detaching the blind cord or chain is a crucial step in removing Roman blinds. Start by locating the plastic cleat or metal tensioner that holds the cord or chain in place. Use a screwdriver or your fingers to loosen and remove any screws if necessary. Next, carefully unwind the blind cord or unhook the chain from its attachment point. Take note of how the cord or chain is threaded through any pulleys or loops along the top rail of the blinds. This will make reinstallation easier later on. Once detached, inspect the blind cord or chain for any signs of wear and tear. If it appears frayed or damaged, now might be a good time to replace it with a new one before reinstalling your blinds. Now that you have released the blind cord or chain, you are ready to move on to removing the blinds from the window. This next step will involve taking down the mounting brackets and carefully lifting off each individual slat of your Roman blinds. Remember, safety should always come first when working with window treatments. Removing the Blinds from the Window Now, it’s time for you to liberate your windows by setting the blinds free from their captivity within the window frame. Removing Roman blinds from the window is a straightforward